Extreme Bevy: Making a p2p web game with rust and rollback netcode
In my previous post, Introducing Matchbox, I explained how Matchbox solves the problem of setting up peer-to-peer connections in rust web assembly for implementing low-latency multiplayer web games. I said I'd start making games using it and I figured it's about time I make good on that promise, as well as write a tutorial while at it. I'll explain step-by-step how to use Bevy, GGRS, and Matchbox to recreate the old classic Extreme Violence by Simon Green with online p2p multiplayer using rollback netcode.
The finished game can be played here: helsing.studio/extreme
Extreme Violence
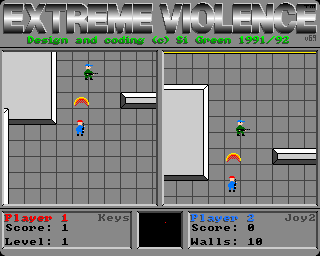
Extreme Violence is one of my early childhood memories. It's the Amiga game that had it all: great graphics, cool sound effects and intense multiplayer action.
In the author, Simon Green's, own words, the game is built around "idiot-proof run-around-and-shoot-the-other-guy gameplay". Apart from the opportunity to go on about the good ol' days, I chose it as it is a test project because it's simple, but compared to other simple games, it's still fun to play (yes, looking at you, Pong!).
You can probably tell what the gameplay is about just by looking at the screenshot above.
This post is part of a series on making a p2p web game with rust and Bevy.
Starting a project
Start a new rust project
cargo new extreme_bevy
We'll be using Bevy, it's a great game engine built around the Entity Component System (ECS) architecture. I won't go into great detail about Bevy here, though. If you find some of the tutorial hard to follow, the Bevy Book is a good place to start.
Add Bevy in Cargo.toml:
[dependencies]
bevy = "0.13"
Next, replace main.rs with the standard Bevy boiler-plate:
use bevy::prelude::*;

fn main() {
    App::new().add_plugins(DefaultPlugins).run();
}
That should be enough to get a window up and running if we do cargo run.
Web build
But wait! We're making a web game, remember? Not a native one.
NOTE: This tutorial focuses on building a web game. However, all dependencies used, including
bevy_matchboxandbevy_ggrs, work on native as well. You may skip this section if you'd rather make a native p2p game.
First, make sure you have a rust wasm toolchain installed. With rustup, it's simply:
rustup target install wasm32-unknown-unknown
That's enough to build the project for the web.
cargo build --target wasm32-unknown-unknown
However, that will just leave us with a wasm file in the target directory. In order to easily test our project while developing, we'll install wasm-server-runner:
cargo install wasm-server-runner
And configure our project to use it by adding a new file, .cargo/config.toml inside our repo:
[target.wasm32-unknown-unknown]
runner = "wasm-server-runner"
Now, when we run the project for the wasm target, it will start a local web server and log the link in the terminal:
$ cargo run --target wasm32-unknown-unknown
    Finished dev [unoptimized + debuginfo] target(s) in 0.28s
     Running `wasm-server-runner target\wasm32-unknown-unknown\debug\extreme_bevy.wasm`
 INFO wasm_server_runner: uncompressed wasm output is 105.13mb in size
 INFO wasm_server_runner: starting webserver at http://127.0.0.1:1334
If you open the link, the "game" should start in the browser:
Before we go on, I have one more tip that will make things easier: Install cargo-watch as well:
cargo install cargo-watch
With it, you can detect changes in the project directory, and automatically rebuild and relaunch the server:
cargo watch -cx "run --target wasm32-unknown-unknown"
Now, when you want to test a change, you simply have to save and refresh your browser.
If you find it tiresome to type wasm32-unknown-unknown all the time, you can set it as your default target in .cargo/config.toml:
[build]
target = "wasm32-unknown-unknown"
And start developing with:
cargo watch -cx run
Build size, debugging and performance
You might be a little bit scared of the 105.13 mb build size reported by wasm-server-runner. This is because Bevy debug builds are ridiculously large... and they're also quite slow. You could "fix" this, by simply running a release build:
$ cargo run --release
    Finished release [optimized] target(s) in 1m 36s
     Running `wasm-server-runner target\wasm32-unknown-unknown\release\extreme_bevy.wasm`
 INFO wasm_server_runner: uncompressed wasm output is 35.54mb in size
 INFO wasm_server_runner: starting webserver at http://127.0.0.1:1334
This is a whole lot better, but at a cost. Bevy and other crates will give you much less useful error messages in release builds. It's much better to tell cargo to optimize our dependencies by putting this in Cargo.toml:
[profile.dev.package."*"]
opt-level = 2
Now we can have useful debug information, and a performant, more decently sized app.
$ cargo watch -cx run
    Finished dev [unoptimized + debuginfo] target(s) in 0.27s
     Running `wasm-server-runner target\wasm32-unknown-unknown\debug\extreme_bevy.wasm`
 INFO wasm_server_runner: uncompressed wasm output is 38.23mb in size
 INFO wasm_server_runner: starting webserver at http://127.0.0.1:1334
Also, note that this is uncompressed size. In production, your web server should serve the wasm file with brotli or gzip compression.
When run through wasm-opt and compressed with brotli, the wasm size is roughly 6.1 mb.
Filling the whole tab
So you might have noticed that in the browser our window doesn't fill the whole tab.
This is because bevy/winit for some peculiar reason has chosen to let the app control the size in a given number of device pixels. By default the number of device pixels is 1280x720, however, there is a pretty low chance that the browser tab window will be exactly 1280x720, or whatever other number we might choose.
We can fix this by telling bevy to resize its canvas to the parent html element:
    App::new()
        .add_plugins(DefaultPlugins.set(WindowPlugin {
            primary_window: Some(Window {
                // fill the entire browser window
                // TODO: re-enable in Bevy 0.14
                // fit_canvas_to_parent: true,
                // don't hijack keyboard shortcuts like F5, F6, F12, Ctrl+R etc.
                prevent_default_event_handling: false,
                ..default()
            }),
            ..default()
        }))
        .run();
NOTE: Unfortunately,
fit_canvas_to_parentwas removed in Bevy 0.13, but it will be re-added in Bevy 0.14. There are ugly workarounds for this, but this tutorial will simply wait for Bevy 0.14.
We also tell it not to be greedy about keyboard events, so the web page will continue to work like a normal web-page.
Now you can resize the tab, and the canvas should still fill the entire area, and pressing F5 will reload the page.
Setting up the camera
With the boring build stuff out of the way, let's actually start putting content into our black window.
First, add a setup system that initializes a camera and a player sprite
use bevy::{prelude::*, render::camera::ScalingMode};

// fn main() {
        .add_systems(Startup, setup) // <-- NEW
        .run();

// ...

fn setup(mut commands: Commands) {
    let mut camera_bundle = Camera2dBundle::default();
    camera_bundle.projection.scaling_mode = ScalingMode::FixedVertical(10.);
    commands.spawn(camera_bundle);
}
We're creating a 2d camera with a fixed vertical size of 10. Our character will be 1 unit tall, so this means our window will always be "10 players tall". This means that you can't just resize the window in order to see more of the game world. Players with ultra-wide monitors will have a slight advantage, though.
Adding a player
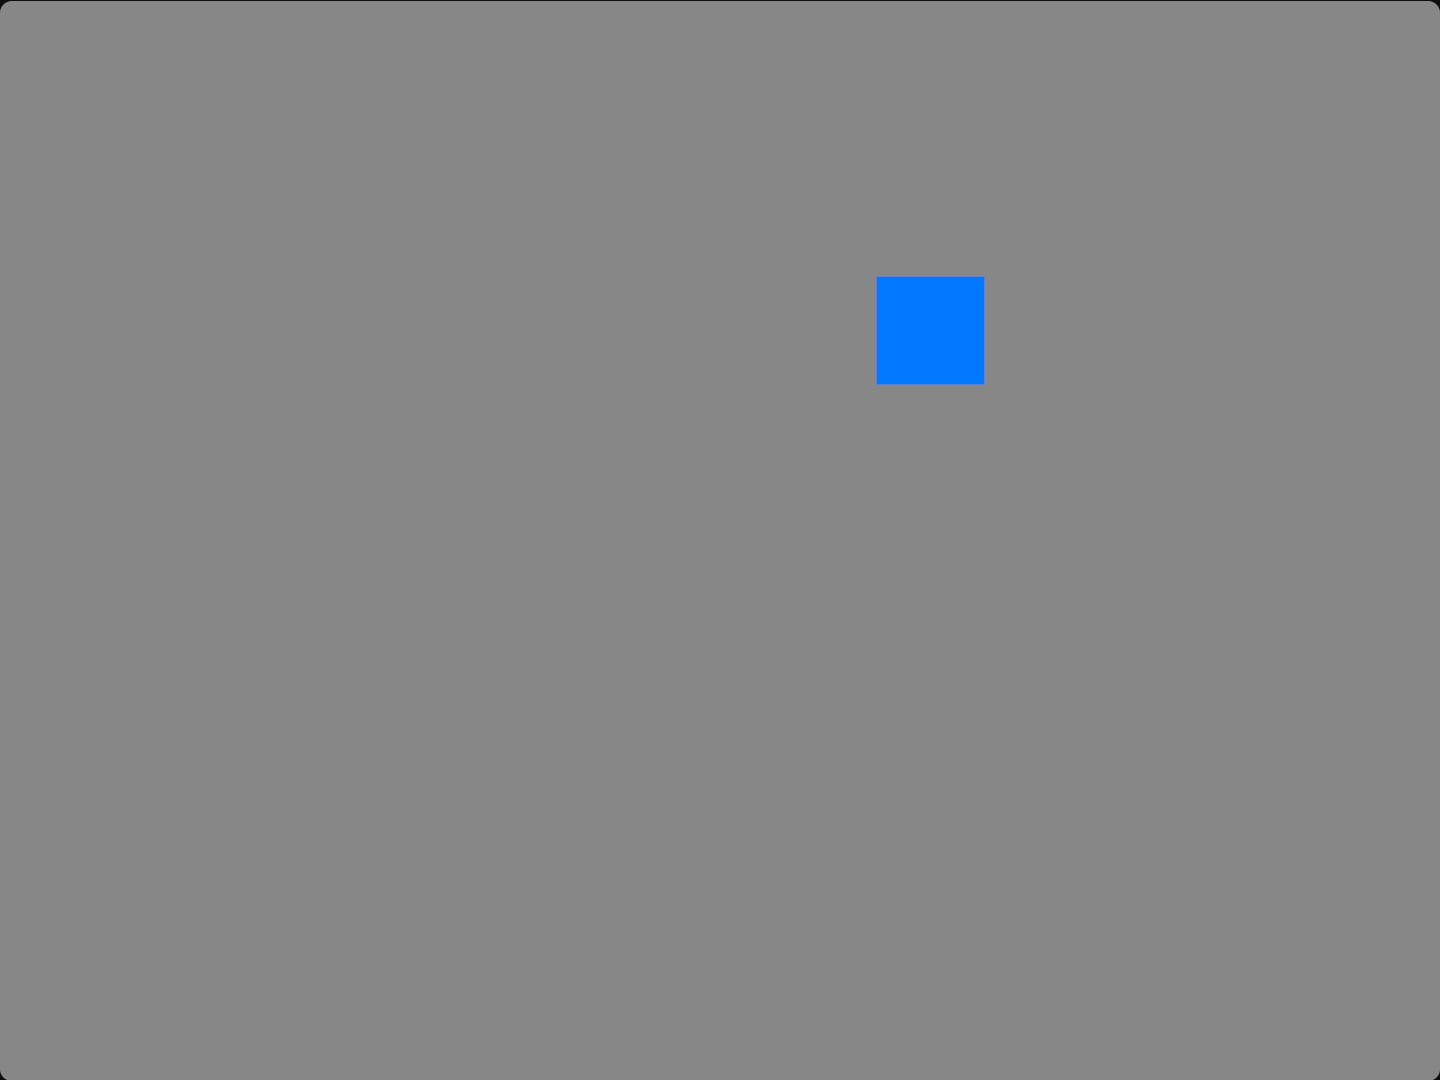
So now that we added a camera, the window is gray instead of black. This is because gray is the default clear color (background) for Bevy cameras.
Let's add a player to this empty gray area:
fn spawn_player(mut commands: Commands) {
    commands.spawn(SpriteBundle {
        sprite: Sprite {
            color: Color::rgb(0., 0.47, 1.),
            custom_size: Some(Vec2::new(1., 1.)),
            ..default()
        },
        ..default()
    });
}
We also need to add the system to the schedule. And while we're there, let's also make the clear color a lighter gray:
    App::new()
        .add_plugins(DefaultPlugins.set(WindowPlugin {
            window: WindowDescriptor {
                // fill the entire browser window
                fit_canvas_to_parent: true,
                ..default()
            },
            ..default()
        }))
        .insert_resource(ClearColor(Color::rgb(0.53, 0.53, 0.53))) // <-- new
        .add_systems(Startup, (setup, spawn_player)) // <-- new
        .run();
And now we have our little guy

Let's make them move on keyboard input:
fn move_player(
    mut players: Query<&mut Transform, With<Player>>,
    keys: Res<ButtonInput<KeyCode>>,
    time: Res<Time>,
) {
    let mut direction = Vec2::ZERO;
    if keys.any_pressed([KeyCode::ArrowUp, KeyCode::KeyW]) {
        direction.y += 1.;
    }
    if keys.any_pressed([KeyCode::ArrowDown, KeyCode::KeyS]) {
        direction.y -= 1.;
    }
    if keys.any_pressed([KeyCode::ArrowRight, KeyCode::KeyD]) {
        direction.x += 1.;
    }
    if keys.any_pressed([KeyCode::ArrowLeft, KeyCode::KeyA]) {
        direction.x -= 1.;
    }
    if direction == Vec2::ZERO {
        return;
    }

    let move_speed = 7.;
    let move_delta = direction * move_speed * time.delta_seconds();

    for mut transform in &mut players {
        transform.translation += move_delta.extend(0.);
    }
}
This system simply samples the keyboard and moves any objects with the Player marker component in the given direction. The speed is set to 7, and multiplied by time.delta_seconds(), this means the player will move 7 times their width each second, this is an action game after all.
Bevy translations (positions) are in 3d, so we converted our 2d vector to 3d using .extend(0).
Now, we need to add the Player marker component:
#[derive(Component)]
struct Player;
And make sure to add it to the player entity:
fn spawn_player(mut commands: Commands) {
    commands.spawn((
        Player,
        SpriteBundle {
            sprite: Sprite {
                color: Color::rgb(0., 0.47, 1.),
                custom_size: Some(Vec2::new(1., 1.)),
                ..default()
            },
            ..default()
        },
    ));
}
And finally, register our new system:
        .add_systems(Startup, (setup, spawn_player))
        .add_systems(Update, move_player) // <-- NEW
        .run()
Now you should be able to move the sprite around the screen with the keyboard.
You can click the embed above to run it in your browser.
Note: The embeds are built on an older version of this tutorial. The behavior should be exactly the same, though. I just haven't gotten around to updating them.
Adding rollback networking libraries
Ok, now that we have something that is at least somewhat interactive, let's see how we can add multiplayer to it.
We'll be using rollback networking with GGRS. What this means, is that we will only be synchronizing players inputs and no actual game state. Each time a peer receives input from another peer, it will roll back its game state to an earlier point in time, insert the input and then re-simulate the frames as if that input had been there all along.
This has an important implication for how we write our game: Everything needs to be perfectly deterministic. Fortunately, rust and wasm makes this easy for us, and the rewards for doing so are big:
- No state synchronization aside from input ⇒ very low bandwidth
- We can write the entire game in simple "forward" systems. No need to handle de-synced inputs. It's all done automatically for us by rolling back and re-simulating.
Let's go ahead and add bevy_ggrs to our dependencies:
bevy_ggrs = { version = "0.15", features = ["wasm-bindgen"] }
NOTE: bevy_ggrs needs the wasm-bindgen feature to work properly on wasm,
otherwise connections will close after a short while.
Connecting players
Before we can start using GGRS, we need some kind of connection between the players. GGRS comes with built-in support for UDP, however that doesn't work in the browser. This is where Matchbox comes in.
Matchbox is a wrapper around the WebRTC browser API and uses its data channels to achieve UDP-like (unordered, unreliable) connections between two browsers.
One part of this project, matchbox_server, is a tiny signaling server that needs to run somewhere reachable by both browsers. In production, this would be somewhere on the web, for now we'll just run it locally.
Go ahead and install and run matchbox_server:
cargo install matchbox_server
matchbox_server
Just leave it running in a terminal while developing.
The second part of Matchbox is the Matchbox socket which runs on the clients. The socket briefly connects to matchbox_server in order to bootstrap direct connections to other peers.
Since we are using Bevy, we will use the bevy_matchbox crate, which makes usage with Bevy a lot simpler.
So let's go ahead and add it to our dependencies, and specify the ggrs feature flag, which makes it compatible with GGRS.
bevy_matchbox = { version = "0.9", features = ["ggrs"] }
The rough outline of what we want to do now, is:
- Create a matchbox socket
- Wait for the other player to join
- Hand the socket's ggrs channel over to ggrs and start a session
We start by creating a system that creates the socket which connects to the Matchbox server and establishes direct connections to other clients.
use bevy_matchbox::prelude::*;

// ...

        .add_systems(Startup, (setup, spawn_player, start_matchbox_socket))

// ...

fn start_matchbox_socket(mut commands: Commands) {
    let room_url = "ws://127.0.0.1:3536/extreme_bevy?next=2";
    info!("connecting to matchbox server: {room_url}");
    commands.insert_resource(MatchboxSocket::new_ggrs(room_url));
}
In the above code, we connect to the Matchbox server running on our machine, and ask to join the extreme_bevy?next=2 room. The first part before the question mark, is an id. This means you can use the same matchbox instance for different scopes. This could be useful if you want to use the same matchbox server for several types of games, or different game modes, or different versions of the game etc.
The second part, next=2 is a special type of room that connects pairs of peers together. The first two peers to connect will be paired, and then the third and fourth will be paired and so on. It's perfect for just testing that we can get 2-players up and running.
Next, we create a new MatchboxSocket using the new_ggrs constructor which will open a single ggrs-compatible data channel (unreliable, unordered if possible), and insert it as a resource. This will make it available as a ResMut<MatchboxSocket<SingleChannel>> resource in other systems.
Let's create such a system where we just wait until we've established a peer connection and then log to the console so can make sure everything works so far:
// fn main()
        .add_systems(Update, (move_player, wait_for_players))

// ...

fn wait_for_players(mut socket: ResMut<MatchboxSocket<SingleChannel>>) {
    if socket.get_channel(0).is_err() {
        return; // we've already started
    }

    // Check for new connections
    socket.update_peers();
    let players = socket.players();

    let num_players = 2;
    if players.len() < num_players {
        return; // wait for more players
    }

    info!("All peers have joined, going in-game");
    // TODO
}
If you start two browsers side-by-side (note they need to both be visible! otherwise the browser will throttle the tab), you should see the message spammed in the console a little while after the second browser loads.
Ok, so we have a connection, time to hand it over to GGRS!
fn wait_for_players(mut commands: Commands, mut socket: ResMut<MatchboxSocket<SingleChannel>>) {
    // ...

    info!("All peers have joined, going in-game");

    // create a GGRS P2P session
    let mut session_builder = ggrs::SessionBuilder::<Config>::new()
        .with_num_players(num_players)
        .with_input_delay(2);

    for (i, player) in players.into_iter().enumerate() {
        session_builder = session_builder
            .add_player(player, i)
            .expect("failed to add player");
    }

    // move the channel out of the socket (required because GGRS takes ownership of it)
    let channel = socket.take_channel(0).unwrap();

    // start the GGRS session
    let ggrs_session = session_builder
        .start_p2p_session(channel)
        .expect("failed to start session");

    commands.insert_resource(bevy_ggrs::Session::P2P(ggrs_session));
}
Here we start creating a bevy_ggrs session using its SessionBuilder. Ggrs need to know how many players there will be, and we also specify an input delay of 2 frames, the reason we do this, is to minimize the amount of rollback the other peer has to do if the inputs arrives late and doesn't align with predicted input. i.e. it's a trade-off between snapping and responsiveness. 2 frames is ~33ms, and is a good middle ground in most cases.
Then, we add the players to the session, the players we get from WebRtcSocket::players(), contain everything we need, we just need to assign a handle to each of them. We simply assign integers in the order that they arrive.
Lastly, we pass the socket's data channel to SessionBuilder::start_p2p_session, and insert the session as a bevy_ggrs::Session resource.
We also need to update our uses:
use bevy::{prelude::*, render::camera::ScalingMode, tasks::IoTaskPool};
use bevy_ggrs::*;
use matchbox_socket::{WebRtcSocket, PeerId};
This won't compile just yet. The GGRS session builder also takes a generic type parameter, Config, which we have to define. The easiest way to do so, is to make a type alias for bevy_ggrs::GgrsConfig:
// The first generic parameter, u8, is the input type: 4-directions + fire fits
// easily in a single byte
// The second parameter is the address type of peers: Matchbox' WebRtcSocket
// addresses are called `PeerId`s
type Config = bevy_ggrs::GgrsConfig<u8, PeerId>;
In our case, the input consists of four direction buttons, and eventually the fire button as well. This means it fits easily within a single byte.
Now that we have a session up and running let's start making sure our gameplay systems makes use of them.
Currently, we have a move_player system, but it just reads input directly from the keyboard and moves the local player only, so the GGRS session doesn't do anything useful yet. Our input needs to be encoded to the u8 we defined in the Config type and handed over to GGRS.
Let's first define some bit mask constants to signify what bit means what:
const INPUT_UP: u8 = 1 << 0;
const INPUT_DOWN: u8 = 1 << 1;
const INPUT_LEFT: u8 = 1 << 2;
const INPUT_RIGHT: u8 = 1 << 3;
const INPUT_FIRE: u8 = 1 << 4;
We now move the input sampling from move_player into a special read_local_inputs system. This system should update a LocalInputs::<Config> resource with the latest input for all players listed in the LocalPlayers resource:
fn read_local_inputs(
    mut commands: Commands,
    keys: Res<ButtonInput<KeyCode>>,
    local_players: Res<LocalPlayers>,
) {
    let mut local_inputs = HashMap::new();

    for handle in &local_players.0 {
        let mut input = 0u8;

        if keys.any_pressed([KeyCode::ArrowUp, KeyCode::KeyW]) {
            input |= INPUT_UP;
        }
        if keys.any_pressed([KeyCode::ArrowDown, KeyCode::KeyS]) {
            input |= INPUT_DOWN;
        }
        if keys.any_pressed([KeyCode::ArrowLeft, KeyCode::KeyA]) {
            input |= INPUT_LEFT
        }
        if keys.any_pressed([KeyCode::ArrowRight, KeyCode::KeyD]) {
            input |= INPUT_RIGHT;
        }
        if keys.any_pressed([KeyCode::Space, KeyCode::Enter]) {
            input |= INPUT_FIRE;
        }

        local_inputs.insert(*handle, input);
    }

    commands.insert_resource(LocalInputs::<Config>(local_inputs));
}
Now that we're properly sending input, we also need to make sure that we're applying it correctly. We update move_player to use inputs from GGRS instead of Inputs<KeyCode>:
fn move_player(
    inputs: Res<PlayerInputs<Config>>,
    mut players: Query<&mut Transform, With<Player>>,
) {
    let mut direction = Vec2::ZERO;

    let (input, _) = inputs[0];

    if input & INPUT_UP != 0 {
        direction.y += 1.;
    }
    if input & INPUT_DOWN != 0 {
        direction.y -= 1.;
    }
    if input & INPUT_RIGHT != 0 {
        direction.x += 1.;
    }
    if input & INPUT_LEFT != 0 {
        direction.x -= 1.;
    }
    if direction == Vec2::ZERO {
        return;
    }

    let move_speed = 0.13;
    let move_delta = (direction * move_speed).extend(0.);

    for mut transform in &mut players {
        transform.translation += move_delta;
    }
}
Now we need to actually add the bevy plugin for GGRS, GGRSPlugin and tell it how to use our two systems.
    App::new()
        .add_plugins((
            DefaultPlugins.set(WindowPlugin {
                primary_window: Some(Window {
                    // fill the entire browser window
                    // TODO: re-enable in Bevy 0.14
                    // fit_canvas_to_parent: true,
                    // don't hijack keyboard shortcuts like F5, F6, F12, Ctrl+R etc.
                    prevent_default_event_handling: false,
                    ..default()
                }),
                ..default()
            }),
            GgrsPlugin::<Config>::default(), // NEW
        ))
        .insert_resource(ClearColor(Color::rgb(0.53, 0.53, 0.53)))
        .add_systems(Startup, (setup, spawn_player, start_matchbox_socket))
        .add_systems(Update, wait_for_players) // CHANGED
        .add_systems(ReadInputs, read_local_inputs) // NEW
        .add_systems(GgrsSchedule, move_player) // NEW
        .run();
Notice we added our read_local_inputs system to the ReadInputs schedule, defined by bevy_ggrs.
All systems that should be affected by rollback (like our move_player system) also needs to be moved to a special rollback schedule, GgrsSchedule. The rollback schedule can be run 0 or more times per frame, depending on whether the game had to roll back or not, and how fast your rendering happens.
If you play it now, you should see that one of the players is be able to control the blue box, while the other is not. That means we're properly sending input!
Actually implementing rollback
While we are sending input we're still not actually using rollback yet. We need to tell bevy_ggrs what kind of entities and components should be rolled back. We don't necessarily want to roll back everything, so this is a good thing!
First, we need to make sure the components that are significant for gameplay are actually rolling back (restored to an earlier state when contradicting input arrives). So far Transform is the only thing that actually changes in our game, so we add that:
        .add_plugins((
            // ...
            GgrsPlugin::<Config>::default(),
        ))
        .rollback_component_with_clone::<Transform>() // NEW
        .insert_resource(ClearColor(Color::rgb(0.53, 0.53, 0.53)))
As we add more components to our game, we need to add them here if they should be rolled back.
Second, we also need entities to opt in to being rolled back. We do this by using the .add_rollback() entity command extension from bevy_ggrs. This adds a Rollback component with a unique id to the entity:
fn spawn_player(mut commands: Commands) {
    commands
        .spawn((
            Player,
            SpriteBundle {
                transform: Transform::from_translation(Vec3::new(-2., 0., 0.)),
                sprite: Sprite {
                    color: Color::rgb(0., 0.47, 1.),
                    custom_size: Some(Vec2::new(1., 1.)),
                    ..default()
                },
                ..default()
            },
        ))
        .add_rollback(); // <-- NEW
}
And with that, the player should actually be rolling back. Since we're running this locally, the latency is very low, and it should probably behave exactly the same as before.
Adding the other player
What we have now is essentially just a single player game with a spectator, which is kind of cool, but what we want is a multiplayer game, so let's rename our system to spawn_players and spawn the other player as well, and put them some distance apart from each other.
fn spawn_players(mut commands: Commands) {
    // Player 1
    commands
        .spawn((
            Player,
            SpriteBundle {
                transform: Transform::from_translation(Vec3::new(-2., 0., 0.)),
                sprite: Sprite {
                    color: Color::rgb(0., 0.47, 1.),
                    custom_size: Some(Vec2::new(1., 1.)),
                    ..default()
                },
                ..default()
            },
        ))
        .add_rollback();

    // Player 2
    commands
        .spawn((
            Player,
            SpriteBundle {
                transform: Transform::from_translation(Vec3::new(2., 0., 0.)),
                sprite: Sprite {
                    color: Color::rgb(0., 0.4, 0.),
                    custom_size: Some(Vec2::new(1., 1.)),
                    ..default()
                },
                ..default()
            },
        ))
        .add_rollback();
}
Now we should at least see two players on screen.
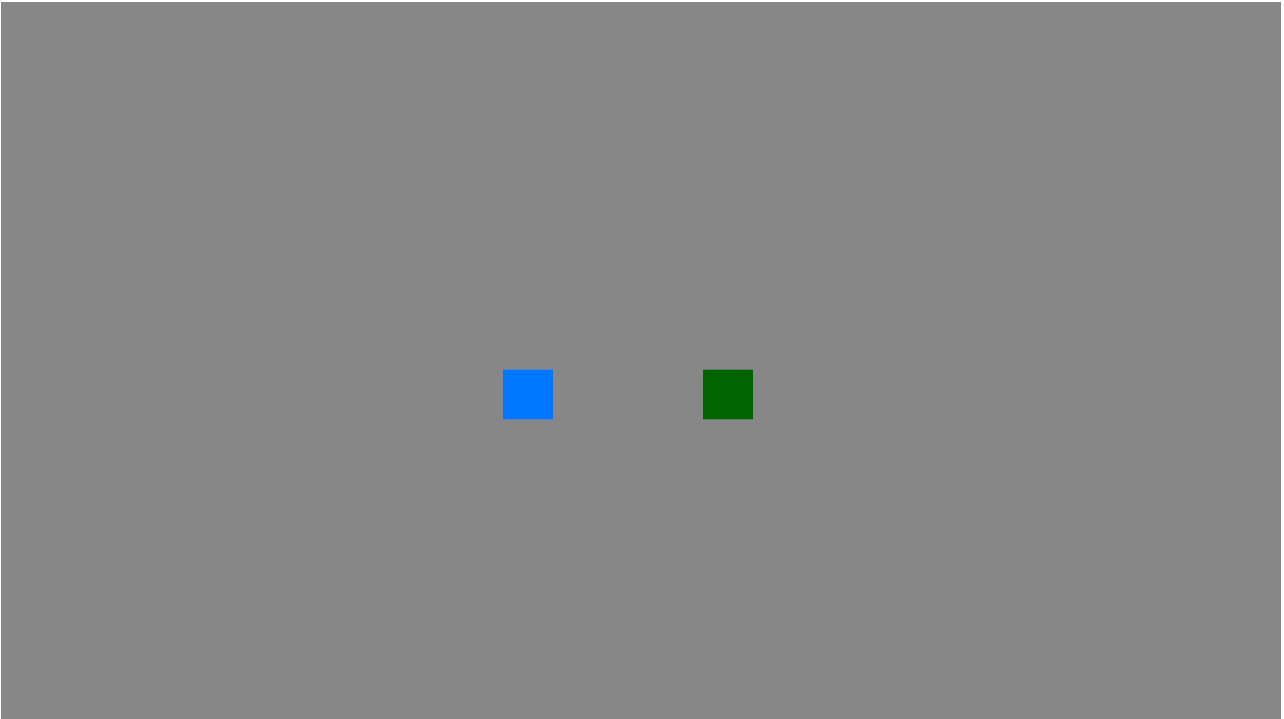
However they're still both controlled by only one of the players input.
We need some way to differentiate between players. So let's go ahead and add a number to our Player struct:
#[derive(Component)]
struct Player {
    handle: usize
};

// ...
// spawn_players()
                Player { handle: 0 }

// ...
                Player { handle: 1 }
And in move_player which we will now rename to move_players, let's use these new handles to index the inputs vector:
fn move_players(
    mut players: Query<(&mut Transform, &Player)>,
    inputs: Res<PlayerInputs<Config>>,
    time: Res<Time>,
) {
    for (mut transform, player) in &mut players {
        let (input, _) = inputs[player.handle];

        let mut direction = Vec2::ZERO;

        if input & INPUT_UP != 0 {
            direction.y += 1.;
        }
        if input & INPUT_DOWN != 0 {
            direction.y -= 1.;
        }
        if input & INPUT_RIGHT != 0 {
            direction.x += 1.;
        }
        if input & INPUT_LEFT != 0 {
            direction.x -= 1.;
        }
        if direction == Vec2::ZERO {
            continue;
        }

        let move_speed = 7.;
        let move_delta = direction * move_speed * time.delta_seconds();
        transform.translation += move_delta.extend(0.);
    }
}
And with that we finally have a multiplayer box-moving game.
You can start the embeds below to try out what we've got so far:
Player 1:

Player 2:
This wraps up the basics. We now have a starting point to expand upon.
In the next tutorial, we will look at adding a background, map edges, and making the camera follow the local player.